
Cell Box
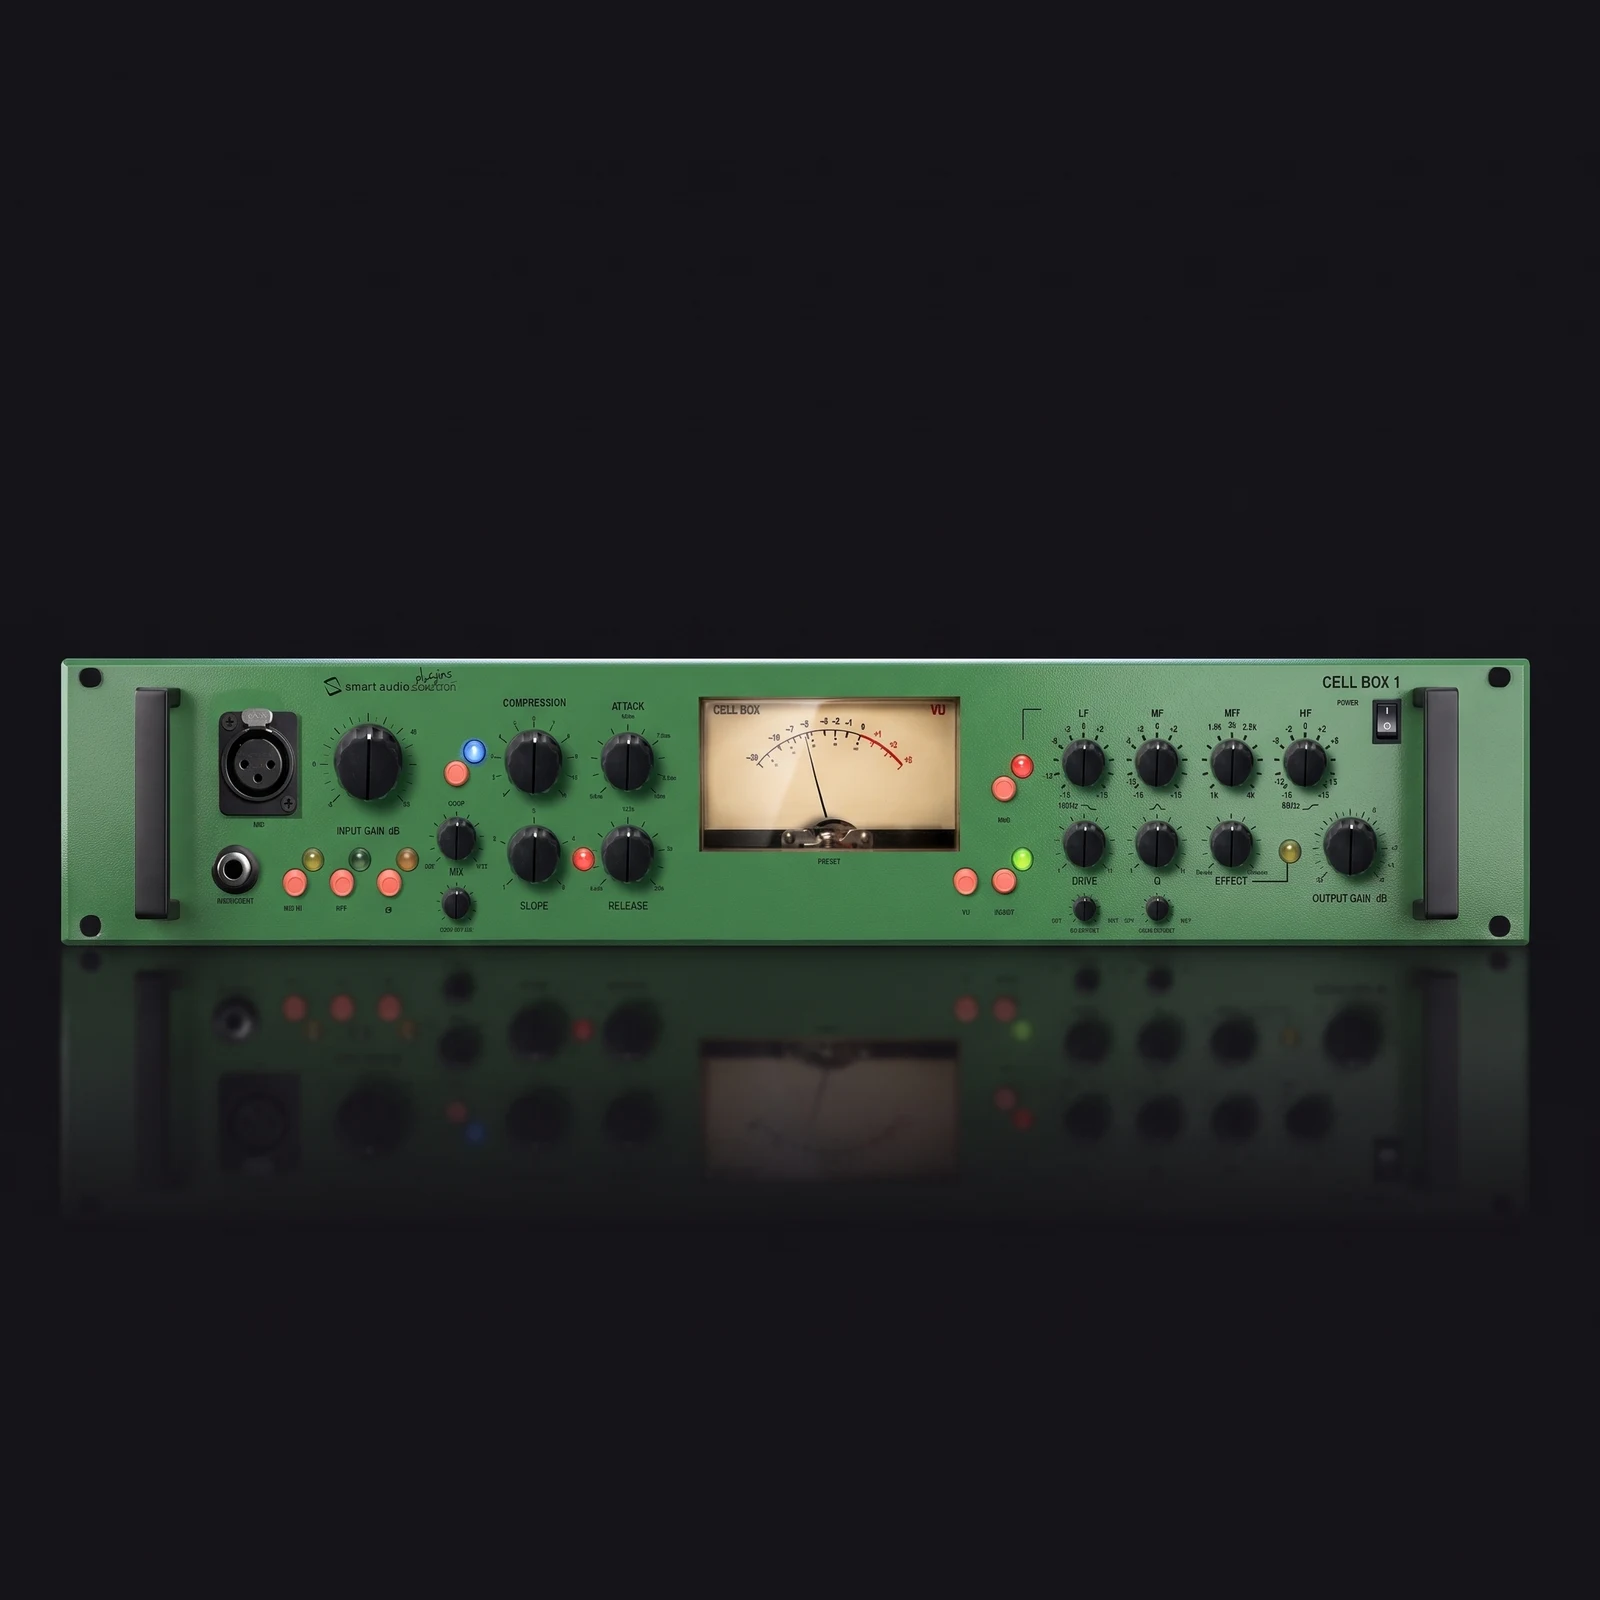
A mic input stage, a photo-optical compressor, a three-band MeQ and an enhancer that also works as a de-esser. Plus four controls the original never had: Mix, Comp Out Lvl, EQ Dry/Wet and Drive Dry/Wet.
AAX, AU, VST3 · 64-bit only · macOS and Windows
Sold and delivered through Audioloom
The story behind it
A photo-optical channel strip
Circuit-accurate modelling of a late-90s British channel strip.
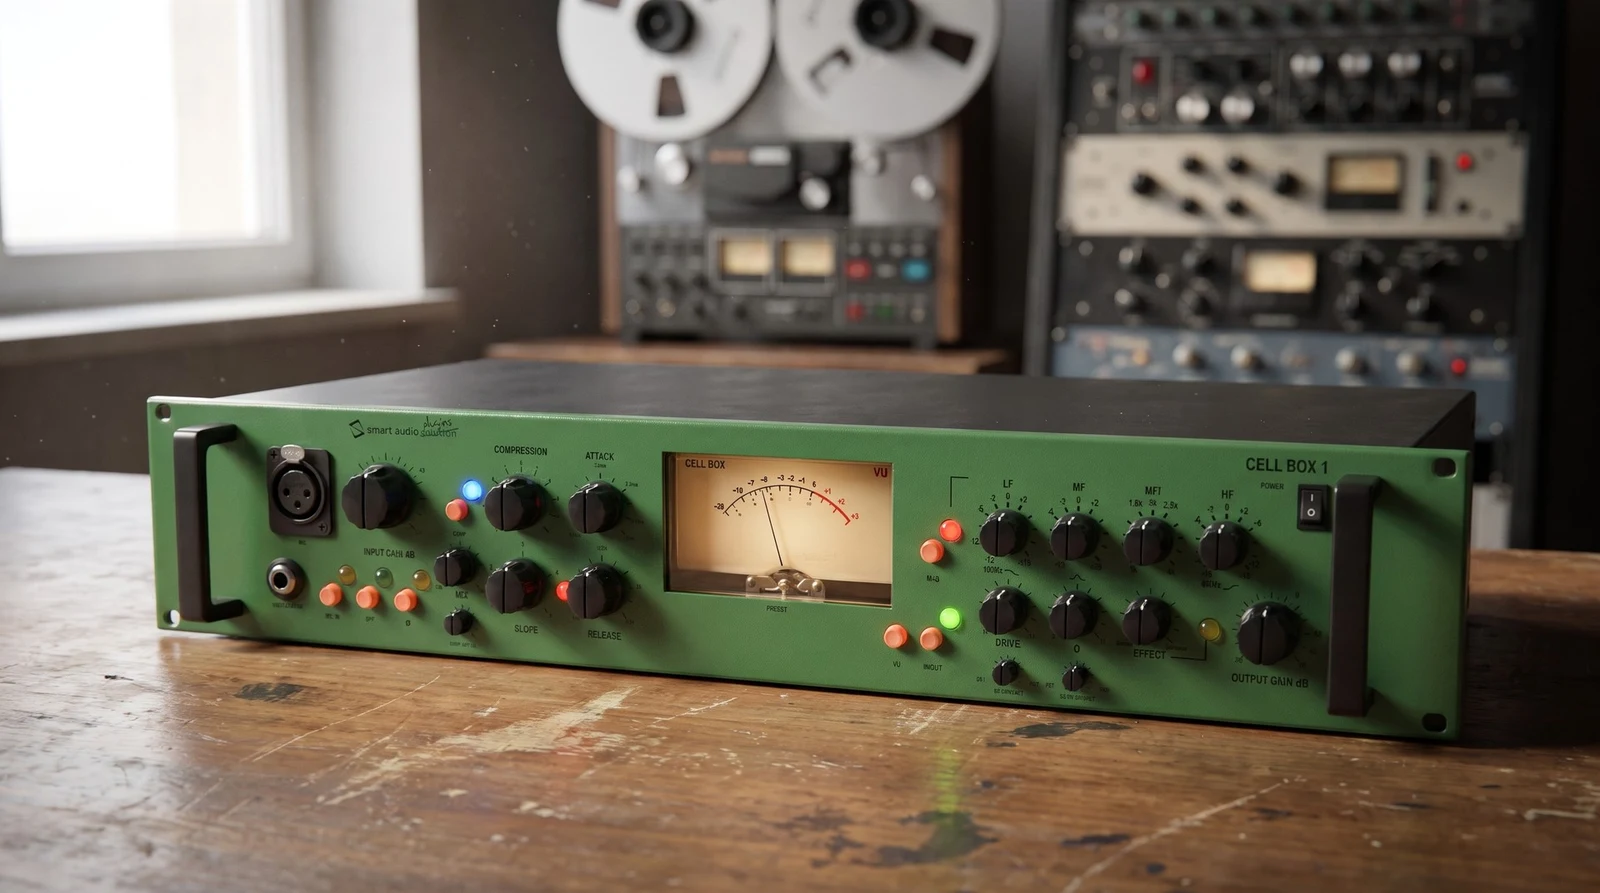
Cell Box is a channel strip: a mic input stage, a photo-optical compressor, a three-band MeQ and an enhancer that also works as a de-esser. The signal runs left to right across the panel in that order, with the EQ after the compressor, as it was in the hardware.
It brings the legendary VC1Q photo-optical channel strip, a British design of the late 1990s, into your DAW. A lamp lights up with the signal and a cell facing the lamp changes its resistance with that light: more light, less level. There is no fixed threshold. Compression comes in gradually and the ratio shifts with how loud and how dense the material is, which is why the same knob positions behave differently on a whispered verse and a shouted chorus.
Four controls were added that the hardware never had: Mix and Comp Out Lvl on the compressor, EQ Dry/Wet on the MeQ and Drive Dry/Wet on the enhancer. They are what make a 1999 circuit usable in a modern mix, where you almost always want to dose the effect rather than take all of it.
About the enhancer: personally I have always found this section useful for making interesting, distorted sounds, more than for the job it is sold as doing. I am curious to see how you will use it.
Video demos
Each clip plays the source through Cell Box and in bypass, at the same loudness. The settings are shown on screen.
Section by section
The input section
Input Gain, Mic In, HPF, polarity
Input Gain runs from −5 to +60 dB. On the hardware this was a mic preamp, so the top of the range is far more than you need on a line-level file. The compressor responds to how hot the input is, so Input Gain and Compression work together: more input means the compressor works harder at the same Compression setting.
Mic In switches in the colouring of the mic input stage: a little low-end thickening and a slight softening at the top.
HPF is a high-pass filter at 75 Hz, 12 dB per octave, and takes out low-frequency rumble before it reaches the compressor. The phase switch inverts polarity.
The compressor
Compression, Slope, Attack, Release
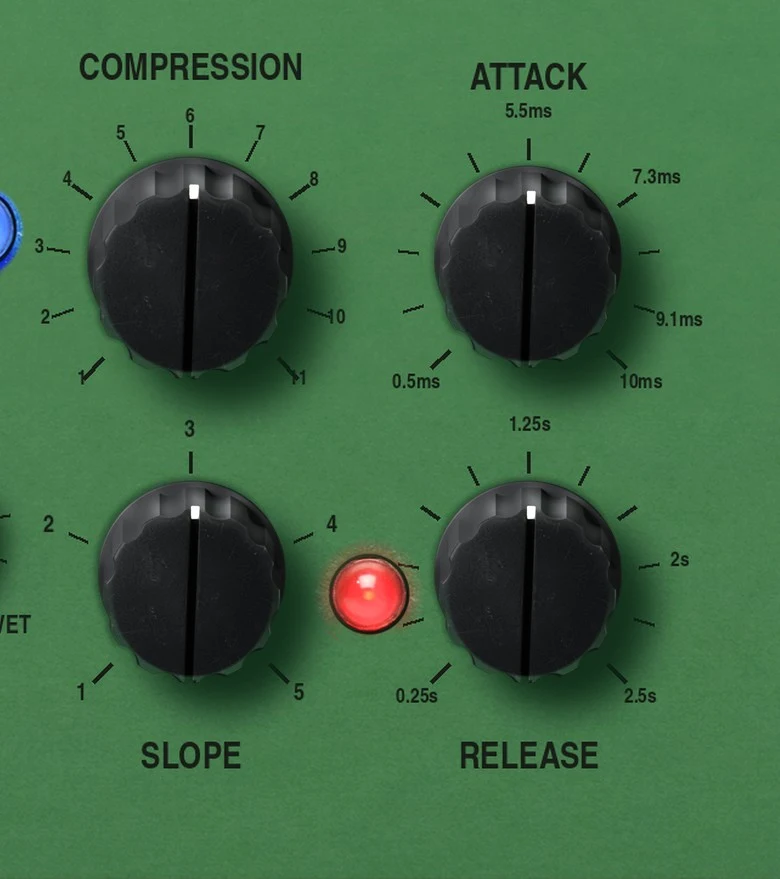
Compression raises the level going into the compressor: up means more compression. It works like a threshold control turned round the other way.
Slope is a five-position stepped rotary and sets the ratio, roughly 1.5:1 at 1 and roughly 8:1 at 5. Positions 2 and 3 suit most material.
Attack sets how fast the compressor acts once it starts. Release sets how long it takes to let go after the signal falls again. With fast attack, fast release and a high Slope the compressor overshoots on a transient and leaves a small dip just after the hit. On a snare or a drum bus it adds a snap that was not in the source.
The red LED beside Release flickers with gain reduction, and it is quicker than the VU needle.
What the hardware never had
Mix, Comp Out Lvl, EQ Dry/Wet, Drive Dry/Wet
Mix is a dry/wet blend across the compressor stage alone: parallel compression without a second track and a bus. Set Compression to 9 and Slope to 4, let it squash, then blend the untouched signal back in at 40 or 50 per cent. You keep the density and get the front of the note back.
Comp Out Lvl is makeup gain for the compressor stage, −12 to +12 dB, and it sits before the Mix blend. That placement is the point: match the two sides with Comp Out Lvl first, then move Mix, and the knob blends character instead of volume.
EQ Dry/Wet is a blend across the whole MeQ section. A +12 dB boost blended back to 40 per cent does not sound like a +5 dB boost at full.
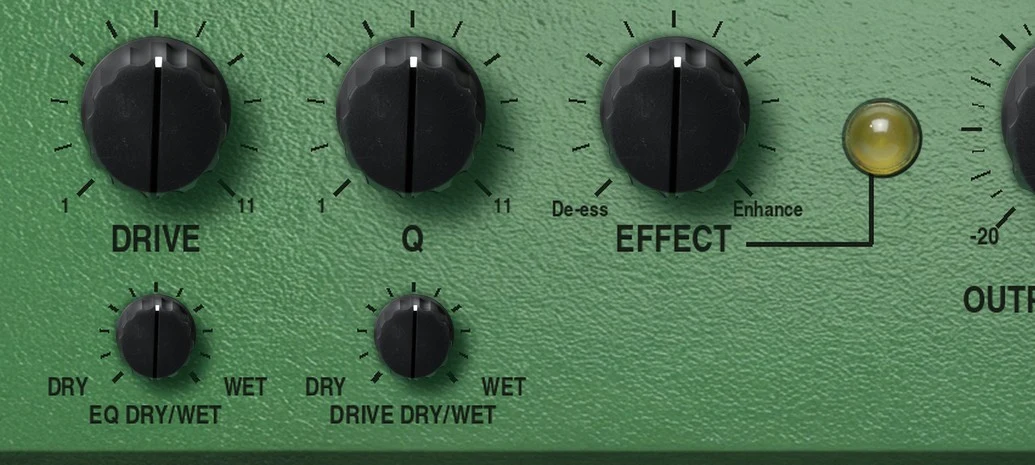
Drive Dry/Wet is a blend across the enhancer, which is easy to overdo. Find the setting that sounds a bit much, then pull it down until it stops announcing itself.
The MeQ
LF, MF, MFf, HF
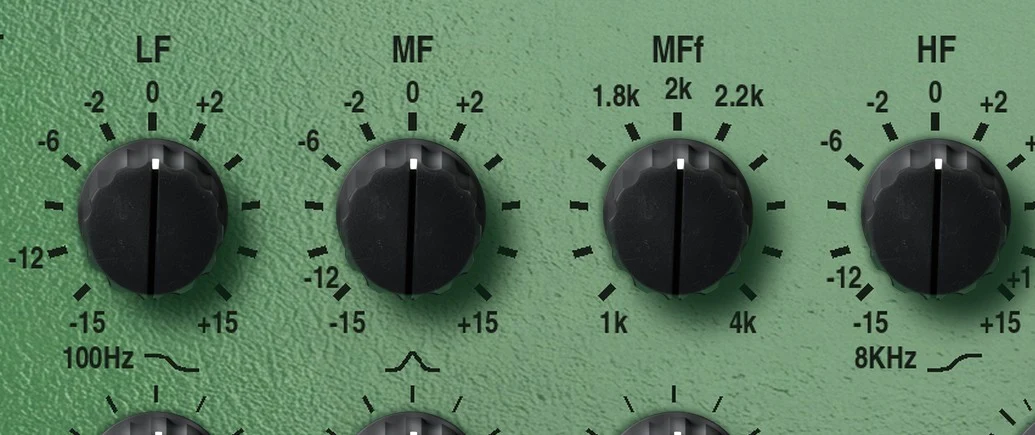
Three bands, all plus or minus 15 dB, sitting after the compressor.
LF is a shelf at 100 Hz, so it moves the whole bottom end together. HF is the same thing at 8 kHz. MF is a peak band and MFf sets its centre anywhere from 1 to 4 kHz.
There is no Q control: the width follows the boost amount, proportional Q. At full boost it is about 1.2, which is wide.
The whole thing is broad and forgiving. It will not do surgery; it does tone. Plus 3 at HF on a vocal, minus 2 at LF on a boomy guitar, a nudge at 2.5 kHz to bring a voice forward.
The enhancer and de-esser
Drive In, Drive, Q, Effect
The enhancer takes the high end of the signal, generates new harmonics from it and adds them back. It is an air box, basically.
Drive sets how much high frequency feeds it. Q sets how long the added harmonic rings on after the syllable: low is short and tight, high trails behind the consonant and can start to sound like reverb on the sibilants.
Effect at centre does nothing. Clockwise adds the harmonics. Anticlockwise subtracts them, which turns the same circuit into a de-esser: set Drive to target the sibilance, then turn Effect anticlockwise until the esses soften. Go too far and the vocal lisps.
Metering and output
VU, VU Mode, Output Gain, bypass
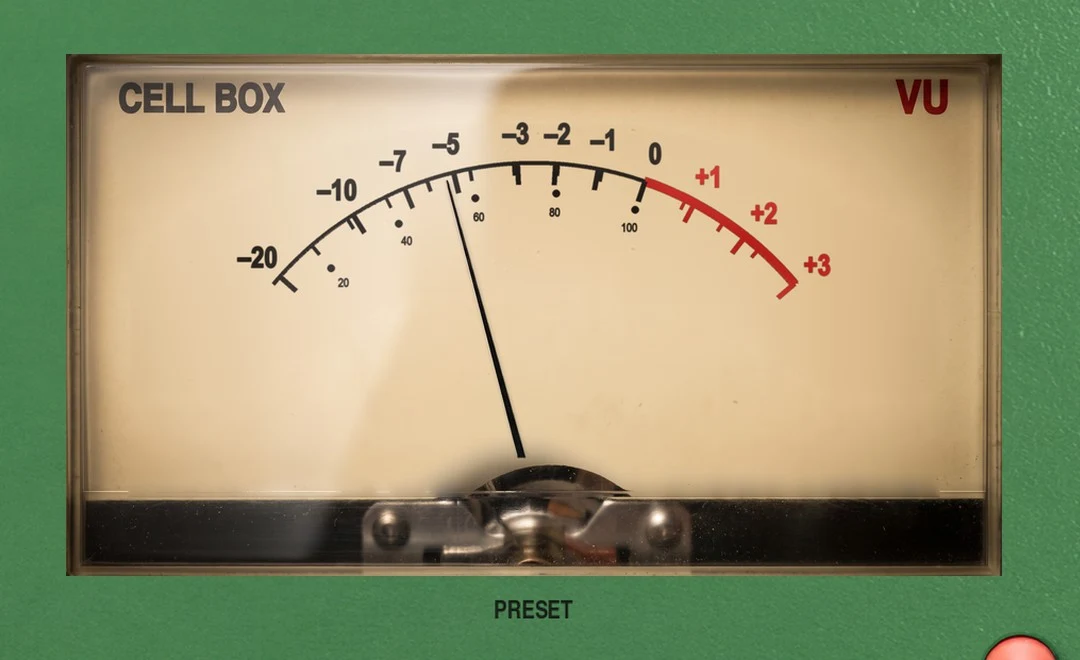
The VU shows output level or gain reduction, and VU Mode flips between them. It is a real VU, averaging over about 300 ms, so it shows loudness rather than peaks; on fast attack settings the red LED beside Release is the quicker guide.
Output Gain is a trim from −20 to +6 dB after everything else, including the meter, so it does not move the needle and you keep your reference. The rocker at the top right bypasses the whole plug-in.
Specifications
Technical data.
- Channels — 2
- Input Gain — −5 to +60 dB
- HPF — 75 Hz, 12 dB/octave, before the compressor
- Compressor — photo-optical, no fixed threshold, programme-dependent
- Slope — five steps, about 1.5:1 to about 8:1
- Comp Out Lvl — −12 to +12 dB, before the Mix blend
- Mix — 0 to 100 %, across the compressor stage only
- MeQ LF — shelf at 100 Hz, ±15 dB
- MeQ MF — peak, centre 1 to 4 kHz (MFf), ±15 dB, proportional Q
- MeQ HF — shelf at 8 kHz, ±15 dB
- EQ Dry/Wet — 0 to 100 %, across the MeQ
- Enhancer — harmonic generator with Drive, Q and Effect; Effect anticlockwise works as a de-esser
- Drive Dry/Wet — 0 to 100 %, across the enhancer
- Meter — VU, averaging about 300 ms, output level or gain reduction
- Output Gain — −20 to +6 dB, after the meter
DAW support
AAX, AU and VST3 — 64-bit only.
- Ableton Live 11+ — Mac & PC, AU / VST3
- Bitwig 4+ — Mac & PC, AU / VST3
- Cubase 13+ — Mac & PC, VST3
- Digital Performer 11+ — Mac & PC, AU / VST3
- FL Studio 23+ — Mac & PC, VST3
- GarageBand 10+ — AU
- Logic Pro 10+ — AU
- Pro Tools 12+ — Mac & PC, AAX
- Studio One 5+ — AU / VST3
- Reaper 6+ — Mac & PC, VST3
- Cakewalk by BandLab — PC, VST3
AAX is a trademark and software of Avid Technology. Audio Units is a trademark and software of Apple Inc. VST3 is a trademark and software of Steinberg Media Technologies GmbH. Joemeek is a trademark of its owner; Cell Box is not affiliated with or endorsed by it.
System requirements
- macOS 10.15 or higher — Intel and Apple Silicon native
- Windows 10
- RAM 4 GB minimum, 16 GB recommended
- Disk 200 MB free on the system drive
- Formats AAX, AU, VST3 — 64-bit only